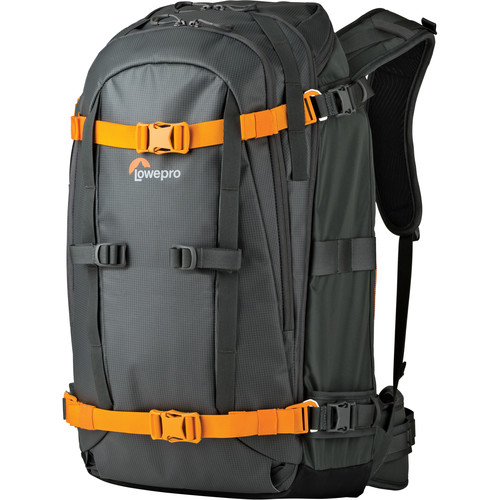
Modified LowePro Whistler 450 AW
This is not a detailed description of this pack or a review but just notes on how I made some changes to it to better fit my needs. For the past 12+ years I had one camera backpack which has been used and abused around the world so last year I decided to retire it. The search for a replacement was much more difficult than I had expected. This led to the purchase of four new bags of different sizes and most were for a more specific purpose such as a sling bag for light and quick hikes up to other full size packs much like I’d been using.
I originally decided that the LowePro Whistler 450 AW was too small to accommodate everything I’d typically carry in the field. I took my full kit into the local camera shop, Pictureline in Salt Lake City, and even though I loved the overall design of the bag, because of the rigged sides of the bag it would not expand wide enough to fit my gear. Later, while leading a photo tour in Yellowstone last winter, a friend showed up with this bag and showed me how she’d modified it to work. This involved a razor, duct tap and the nerve to slice into a brand new $400 pack. What follows is a description of what I did to make this great pack work. Please keep in mind I am a nature photographer and not an adventure sports shooter for which is basically what this bag was designed. Read more here…
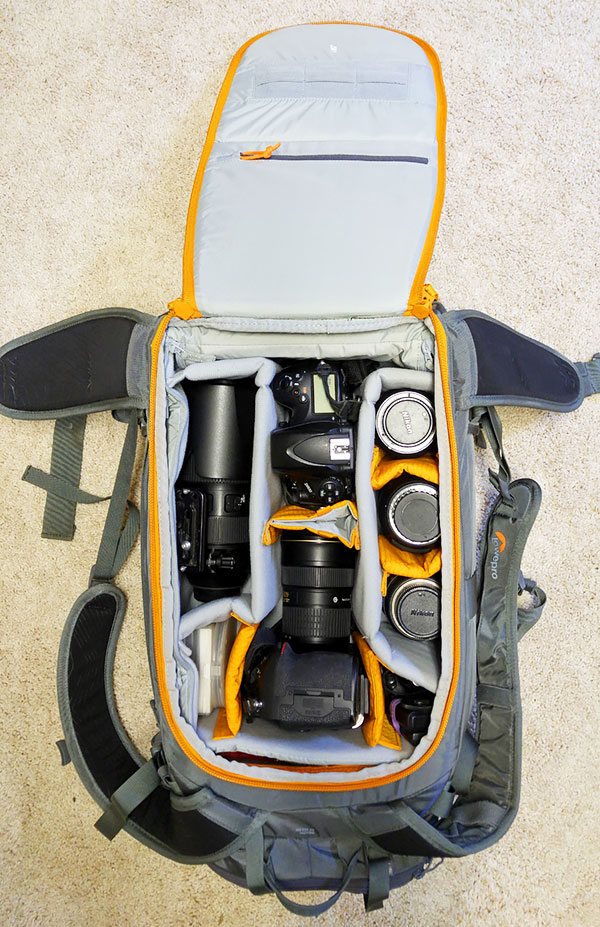 Image 1
Removing the rigged panels from the sides and top of the insert.
My packed bag. As you can see I have two rows with lenses, 2 full-frame DSLR’s (Nikon D810’s) filters releases, etc. This is just the main compartment. I’m only going to show and modify this large interior section.
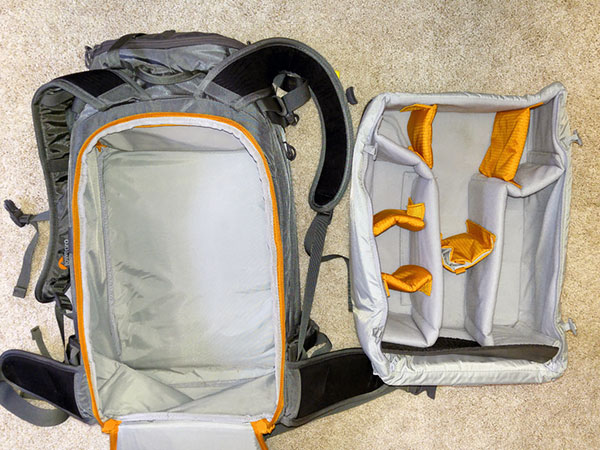 Image 2
I removed the inside storage unit which is easy enough to do by simply sliding the loops through the toggle hook seen in photo #3.
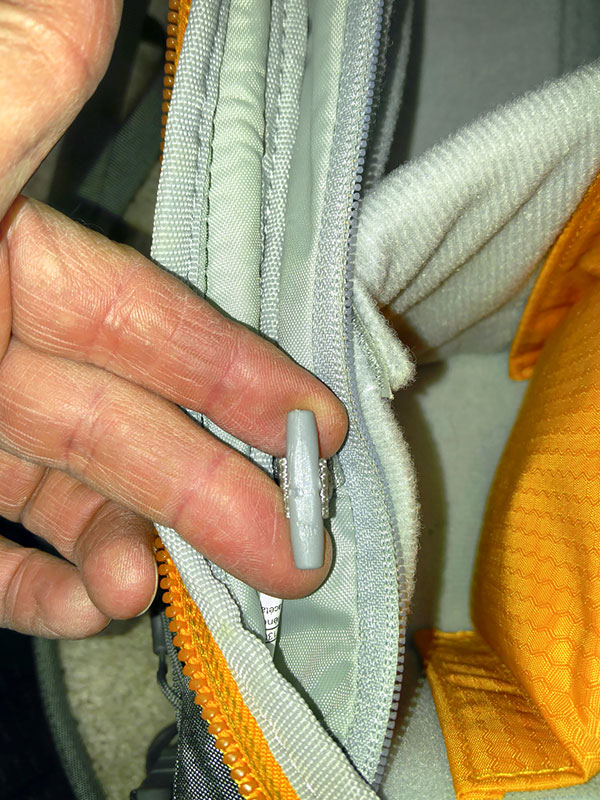 Image 3
There are four of these toggles inside the pack. The first time I pulled out the inside compartment it was very tight getting these toggles through the loops so I used some needle nose pliers.
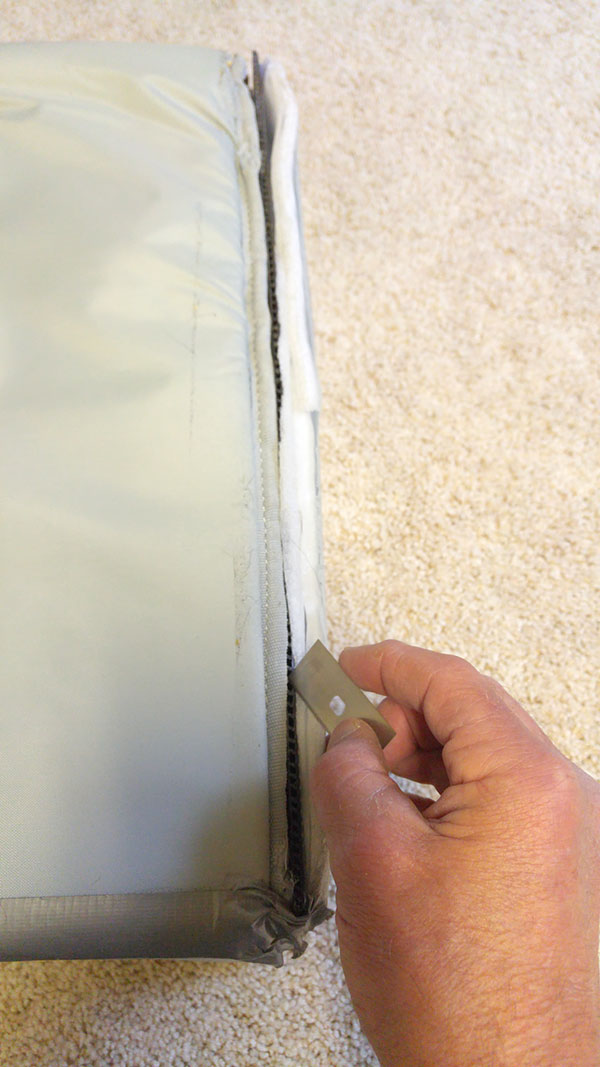 Image 4
After removing the inside compartment I turned it over and with a razor I made slits along the seams on both sides as well as the top so I could remove the ridged panels. I left the bottom one in place. These panels have an easy to detach adhesive on them so they will not simply pull out without a little coaxing.
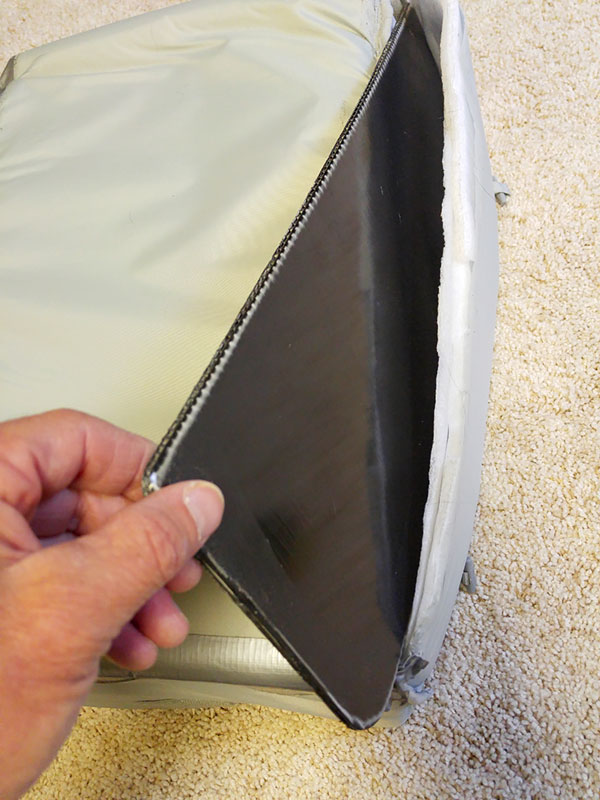 Image 5
Removing the rigged panels from the sides and top of the insert.
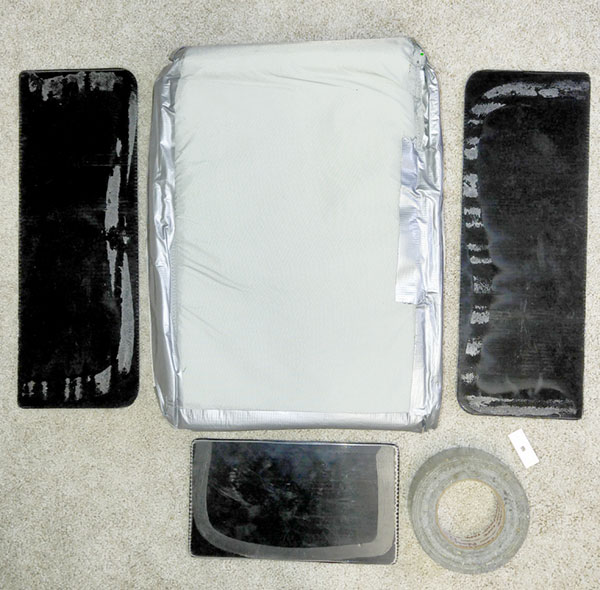
Image 6
After removing the rigged panels it’s simply a matter of taking the duct tape and closing up the slits you made. Mine appears a bit messy as I’ve taken it apart a couple times for photo purposes. Keep in mind that all of this will be hidden and protected once you place the insert back into the pack.
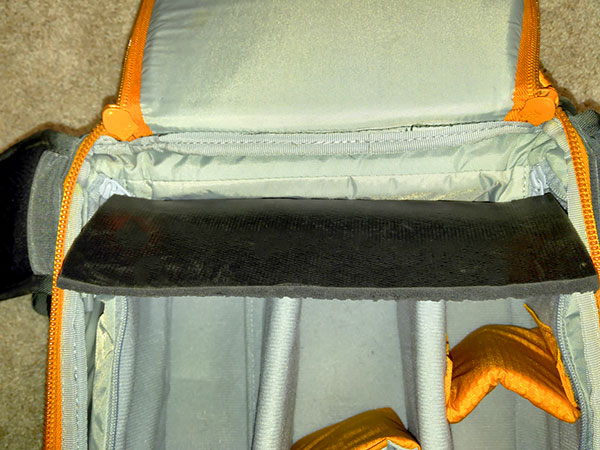 Image 7
I noticed a hard ridge at the bottom of the pack which cut into my back. To help make it less noticeable I inserted a piece of dense rubber padding as seen here.
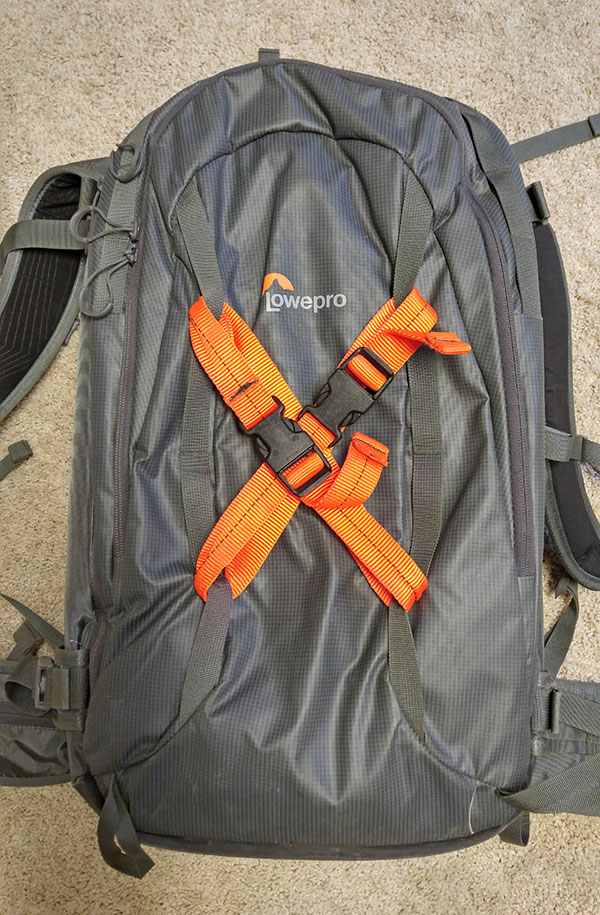 Image 8
There are many ways to customize this pack with all of the available loops, straps and compartments. I removed most of the straps that came with the pack but then added two pieces of webbing seen crisscrossing here where I could quickly tuck away a jacket or strap down other items. I also use this webbing as a tie-down for my tripod when in windy conditions.
The whole idea of what I did and why simply has to do with making the pack slightly more expandable, allowing me to have two rows of lenses as well as the ability to place two bodies in the middle. Last of all. I’m not a large person and without a jacket or coat on I find the waist belt just a little too long when cinched in all the way which is what I require. I have a 33″ waist and with the hip belt tightened all the way, buckle to buckle, it’s just a bit too loose. Guess I’ll just have to have another slice of pizza…or two.
Hope this is of interest. While writing this I found that B&H Photo Video had this pack listed at $252.44.


10 Comments
Great article David. I was pondering purchasing the Whistler 450 but was worried if it would be large enough. I live in a small community without a camera store so I couldn’t check it out personally. While checking out reviews I found your article and, based on it, I went ahead and purchased the pack and will be performing a little “surgery” this weekend to modify it. Thanks for the help!
Hi Bill
Sorry for the delay in getting this posted as I was away shooting for a couple weeks.
Thanks for the comment. Glad the post was of interest and helpful. Hopefully the surgery was a success! :-) I think I mentioned in the post that I left the rigid bottom piece in place for the added support and a bit of protection. Enjoy the new bag!
I purchased one of these with a view to it being the only bag inneed to use. I shoot a lot of rugby and having lugged it around the dubai a Sevens with two bodies a 200-500 and a 70-200. Along with all the other bits and pieces and laptop I changed to a Nanuk 925 for rugby as it’s on wheels. Since then I have been looking of ways to use the Whistler for treking with only one body and two lenses. I think you have just given me the solution – now where did I put the razor blades ;-)
Good luck with the razor blade search! I have a few other bags that I purchased prior to figuring out I could customize the Whistler. Tough call taking the blade to it right away but so far it’s worked great. Take care!
Hi David,
Have the capacity of the insert increased after removing the plastic panels? Did it allow more flexibility width and height-wise? I own Nature Trekker II AW atm which I’m thinking to replace with Whistler and I use three rows of lenses setup, so I’d like to have that too in Whistler.
Did you check how much weight did it took off the backpack?
Thanks in advance
It does make it more flexible but not sure it will be enough for you. I went to a local photo store and tried getting my gear into one first. Could do it but it was VERY tight. Removing the top and side panels was just enough. Weight reduction was minimal. Good luck!
Hello,
Think you for this good idea.
I noticed that this Lowepro Whistler backpack serie is really heavy more than 3 kg for the 450 model.
How many does your backpack weigh now?
Thanks for writing and for the question. The difference in weight is very little. The panels, 3 total, are ridged but very light weight. If you carry much gear like me you would not notice the difference. It is a great pack. I love the design and the materials used. You can also remove the orange webbing which have metal hooks on them to cut weight down a tiny bit. I replaced those with straps with snap buckles but not because of the weight. They just work better for my needs. Hope that helps!
Thanks for this David. I cant seem to fit my gripped D500 with the 200-500 and my 70-200 together in the pack. I have to remove the lens hood off the 200-500. When I get back to the house I am going to give this a go.
Anyone try something other then duct-tape?
Hello Mike
Hope this fix works for you. I had the 200-500mm on a D500 this winter and carried it in this case. I don’t recall if I had the hoop on and in place or if it was put on in reverse for travel. I also did not have the grip on the D500. Good luck and happy shooting!